Memberstack
Modified on Tue, 13 Aug, 2024 at 1:08 PM
The Memberstack modules allow you to watch, create, update, retrieve, and delete the members in your Memberstack account.
Prerequisites
A Memberstack account
To use Memberstack with Make, it is necessary to have a Memberstack account. If you do not have one, you can create a Memberstack account at app.memberstack.io/signup.
To connect your Memberstack account to Make you need to obtain the API Key from your Memberstack account and insert it in the Create a connection dialog in the Make module.
1. Login to your Memberstack account.
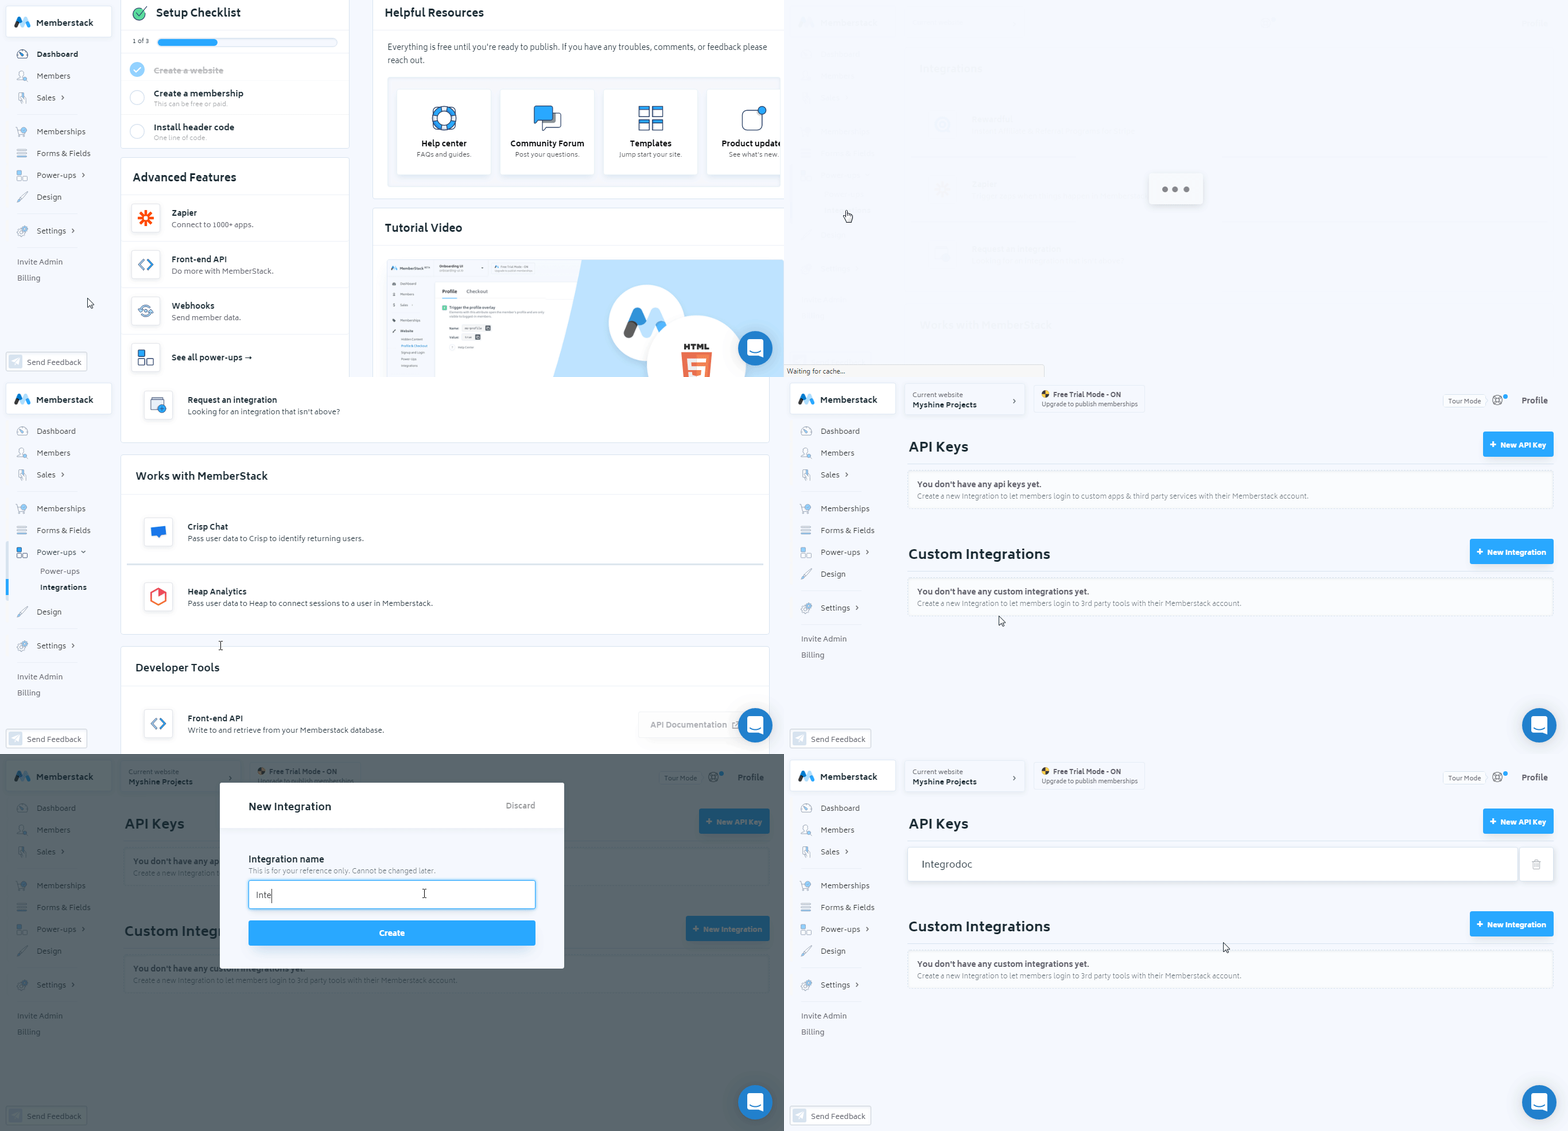
2. Click Power-ups > Integrations > Custom Integrations > New API Key. Enter a name for the API key and click Create.
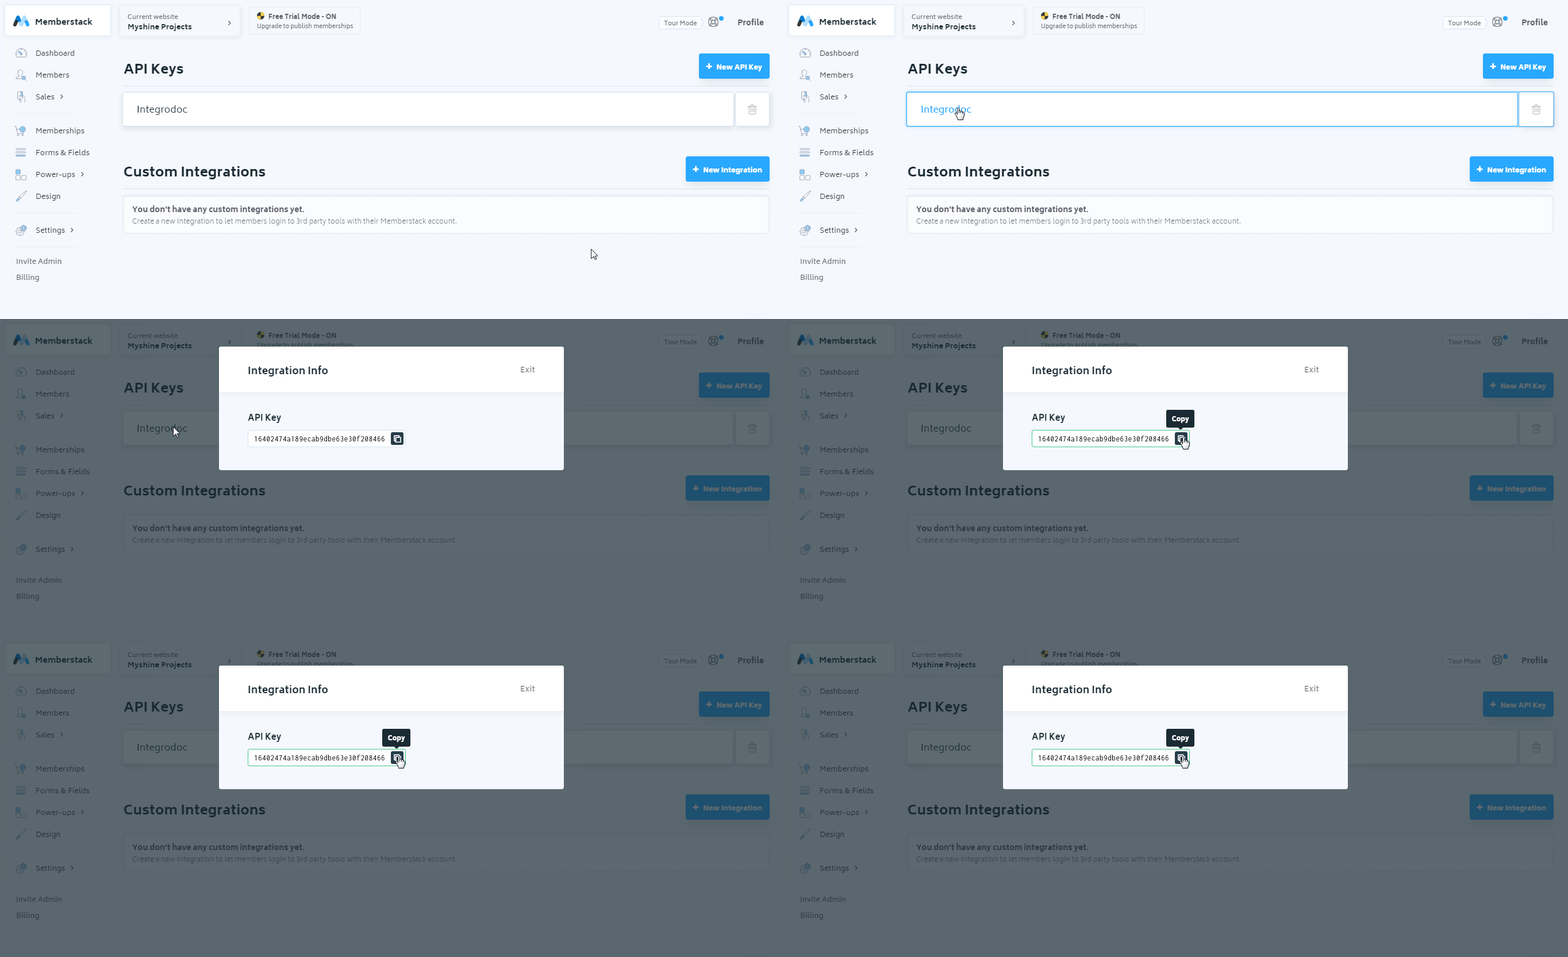
3. Click the API Key name and copy the key to your clipboard.
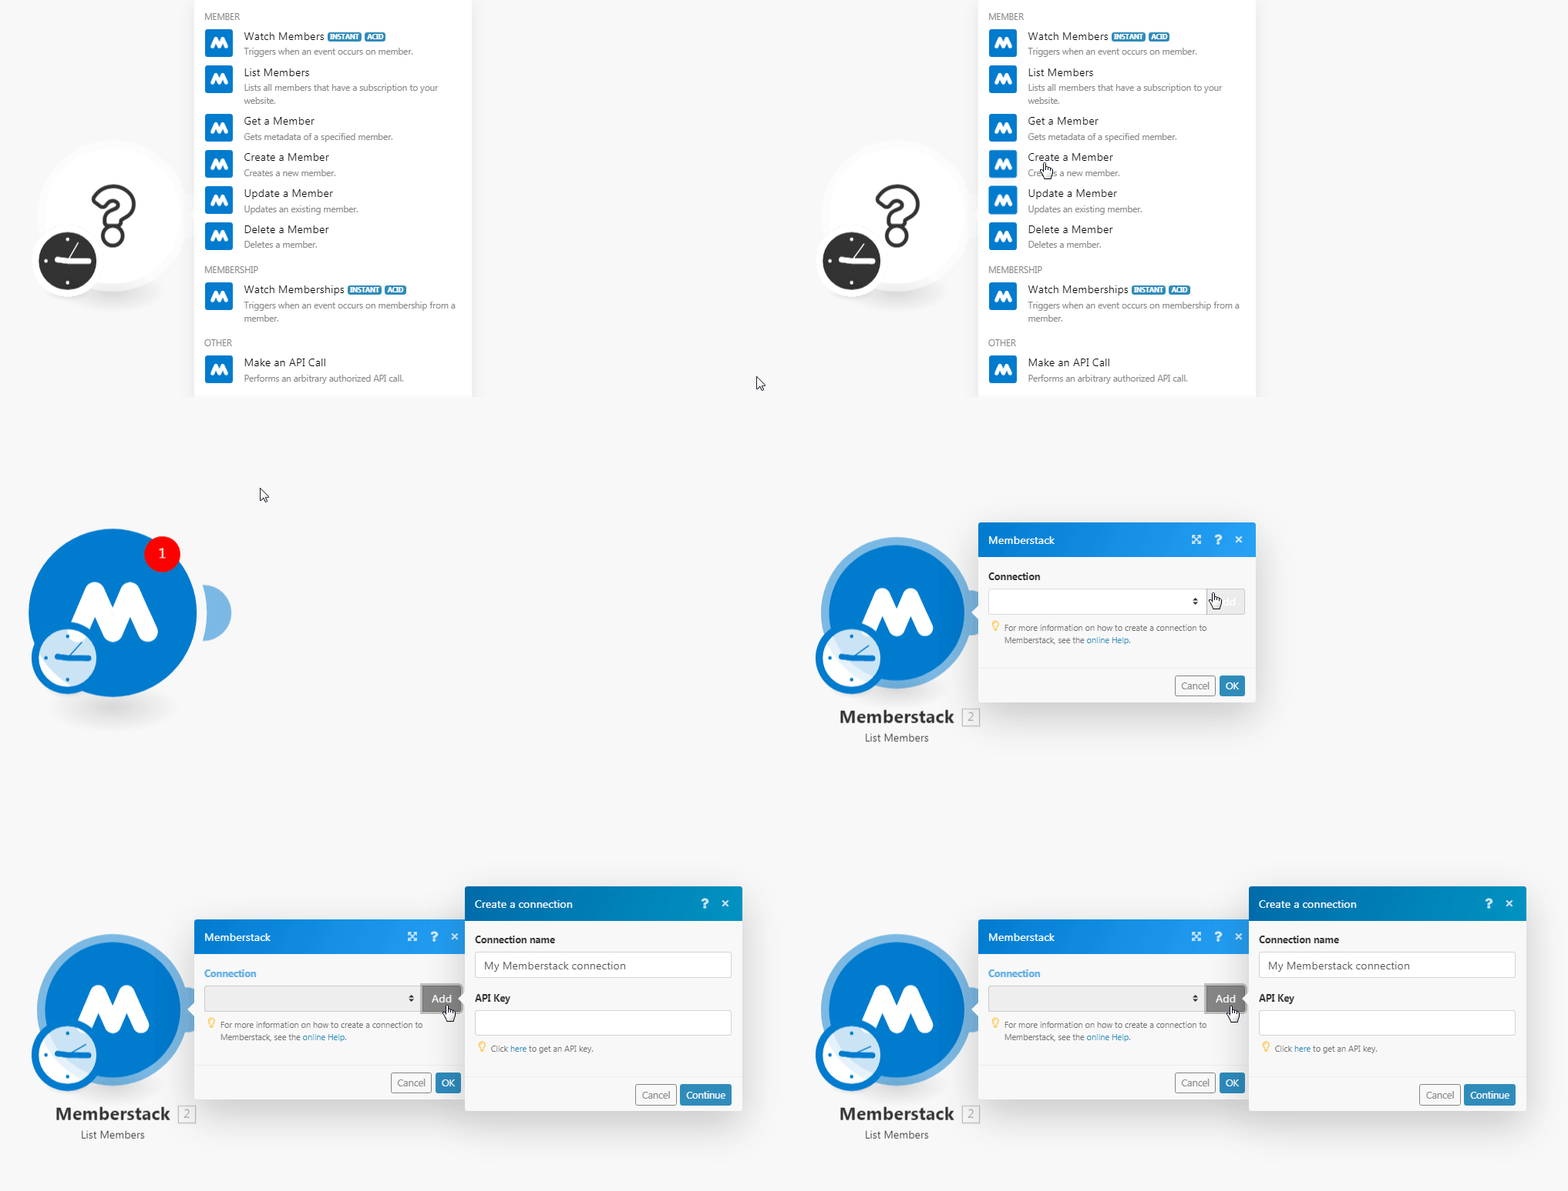
4. Go to Make and open the Memberstack module's Create a connection dialog.
5. In the Connection name field, enter a name for the connection.
6. In the API Key field, enter the API key copied in step 3 and click Continue.
The connection has been established.
Triggers when an event occurs on the member.
Webhook Name | Enter a name for the webhook. |
Connection |
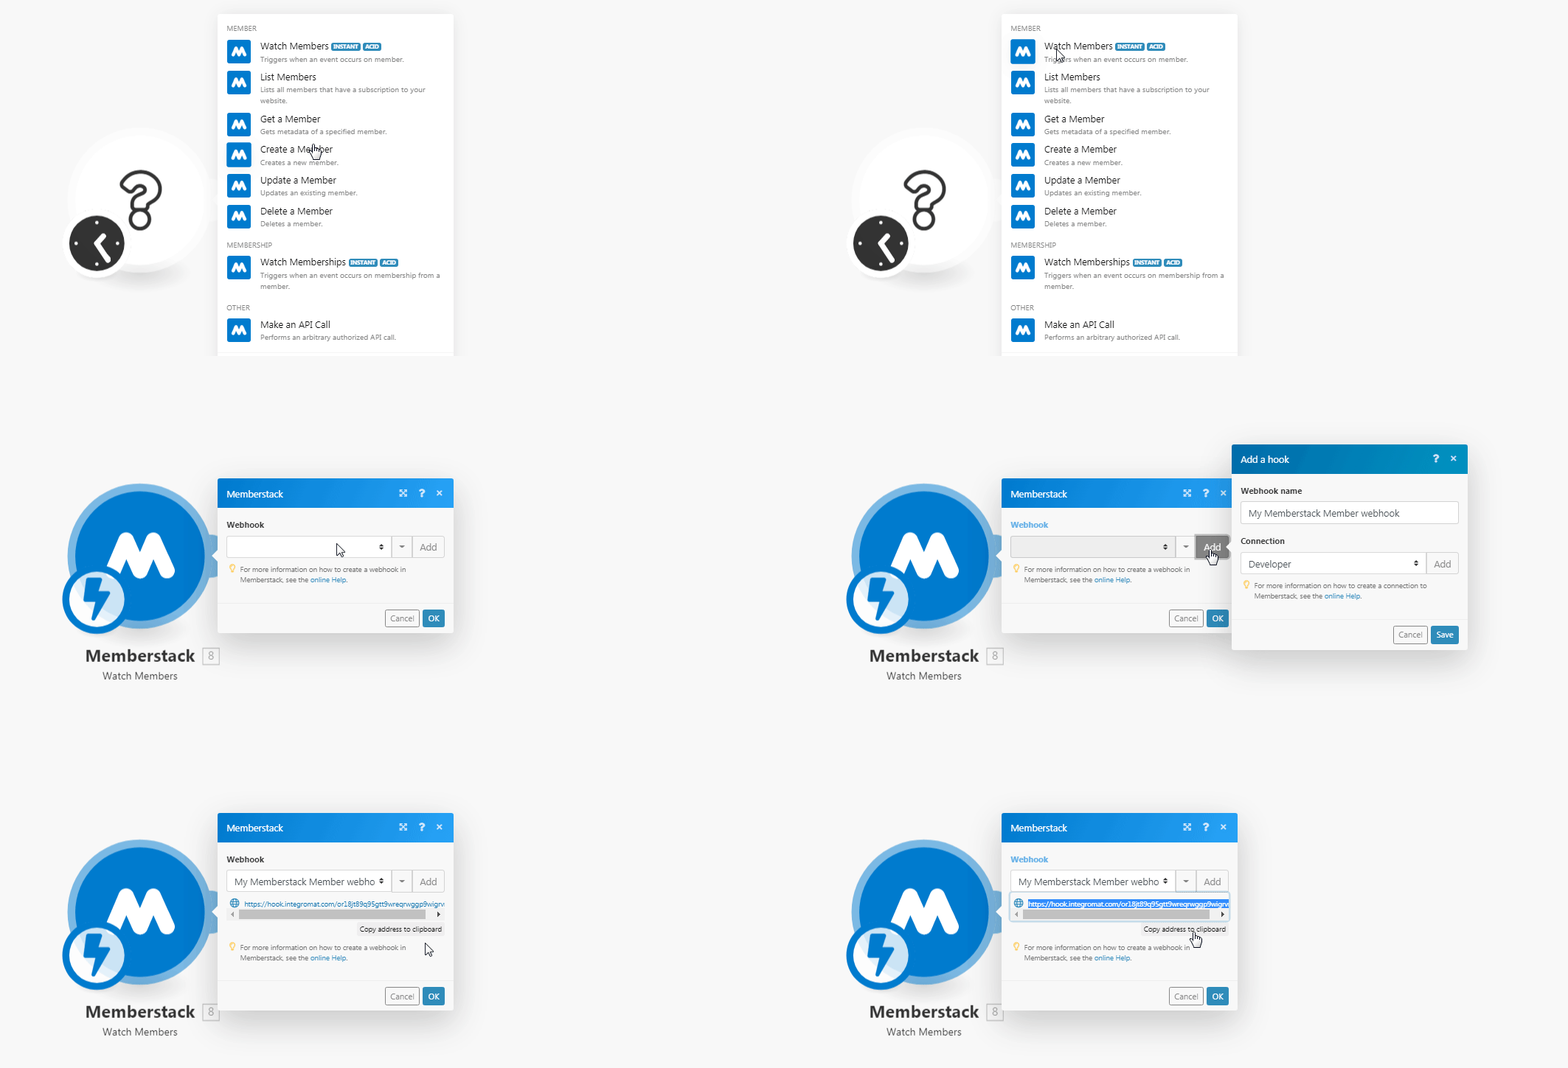
See Setting Up Webhooks to receive Memberstack webhooks and trigger the Watch Members module in your scenario.
Lists all members that have a subscription to your website.
Connection | |
Limit | Set the maximum number of members Make should return during one scenario execution cycle. |
Gets metadata of a specified member.
Connection | |
Member ID | Select the Member ID whose details you want to retrieve. |
Creates a new member.
Connection | |
Enter the email address of the member. | |
Password | Enter the password for the member to login to Memberstack. |
Plan ID | Enter the Plan ID of the membership that the member is subscribed to. You can find the Plan ID details in the membership page by clicking the Signup Link against the plan. |
Custom Fields | Add the custom fields. You can also add the custom fields in your account > Form & Fields. |
Meta Data | Enter the key-value metadata for the member. |
Member Page | Enter the URL address of the member website page. |
Updates an existing member.
Connection | |
Member ID | Select the Member ID whose details you want to update. |
Enter the email address of the member. | |
Password | Enter the password for the member to login to Memberstack. |
Plan ID | Enter the Plan ID of the membership that the member is subscribed to. You can find the Plan ID details in the membership page by clicking the Signup Link against the plan. |
Custom Fields | Add the custom fields. You can also add the custom fields in your account > Form & Fields. |
Meta Data | Enter the key-value metadata for the member. |
Member Page | Enter the URL address of the member website page. |
Deletes a member.
Connection | |
Member ID | Select the Member ID you want to delete. |
Triggers when an event occurs on membership from a member.
Webhook Name | Enter a name for the webhook. |
Connection |
See Setting Up Webhooks to receive Memberstack webhooks and trigger the Watch Membership module in your scenario.
Performs an arbitrary authorized API call.
Connection | |
URL | Enter a path relative to For the list of available endpoints, refer to the Memberstack API Documentation. |
Method | Select the HTTP method you want to use:
|
Headers | Enter the desired request headers. You don't have to add authorization headers; we already did that for you. |
Query String | Enter the request query string. |
Body | Enter the body content for your API call. |
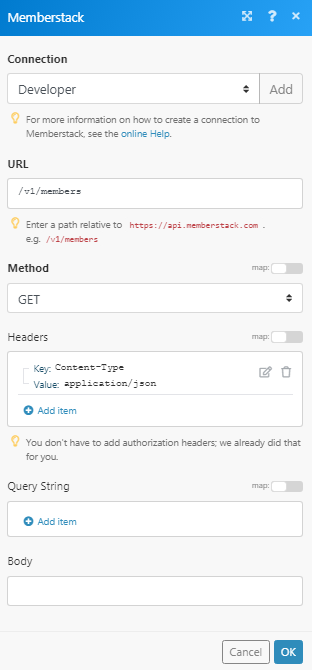
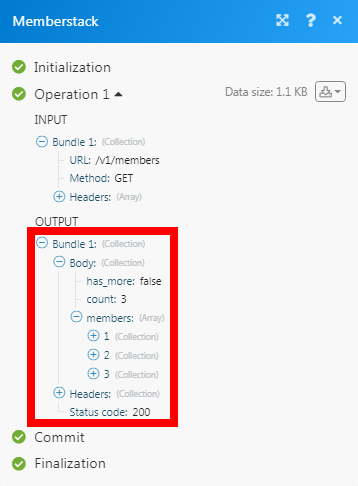
The following API call returns all the members from your Memberstack account:
URL:
/v1/members
Method:
GET
Matches of the search can be found in the module's Output under Bundle > Body > members.
In our example, 3 members were returned:
1. Open any trigger module (Watch Members, Watch Membership), establish a connection as mentioned in the module description above and copy the URL address to your clipboard.
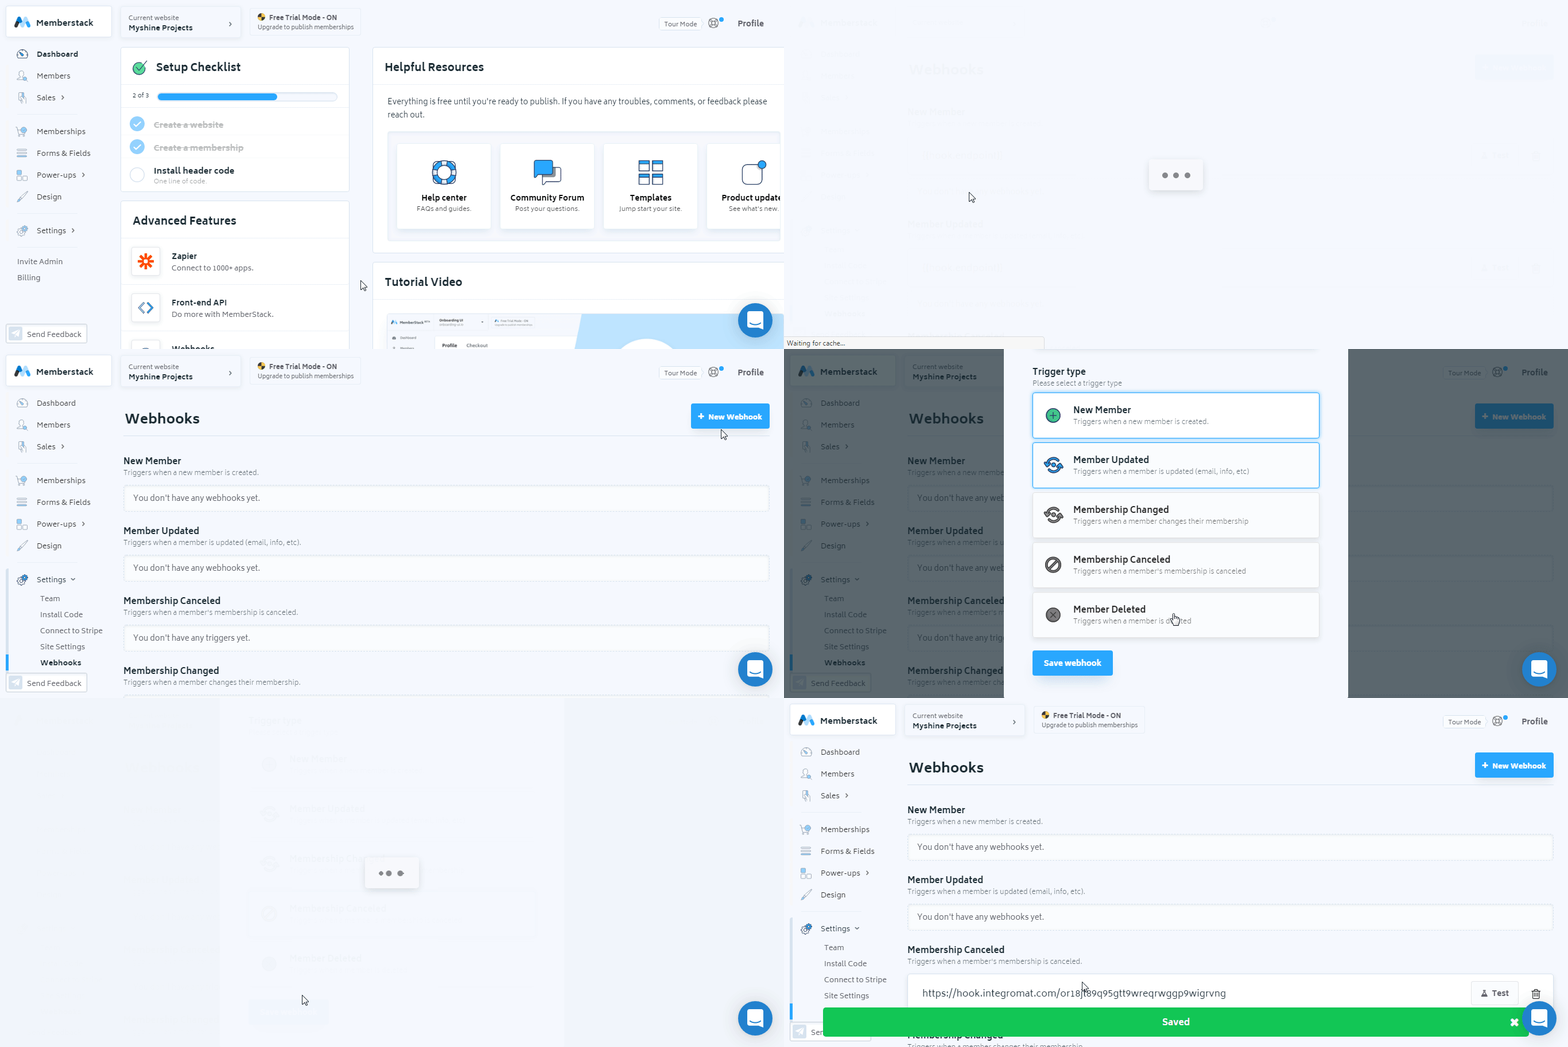
2. Login to your Memberstack account. From the Dashboard, click Webhooks > New Webhook. In the Endpointfield, enter the URL address copied in step 1, select the triggers and click Save.
You have successfully added the webhook.
Was this article helpful?
That’s Great!
Thank you for your feedback
Sorry! We couldn't be helpful
Thank you for your feedback
Feedback sent
We appreciate your effort and will try to fix the article
