JSON
Modified on Thu, 30 May, 2024 at 10:10 AM
Getting started with JSON
The JSON app provides modules to process data in JSON format so that Make can further work with the data content or create new JSON content.
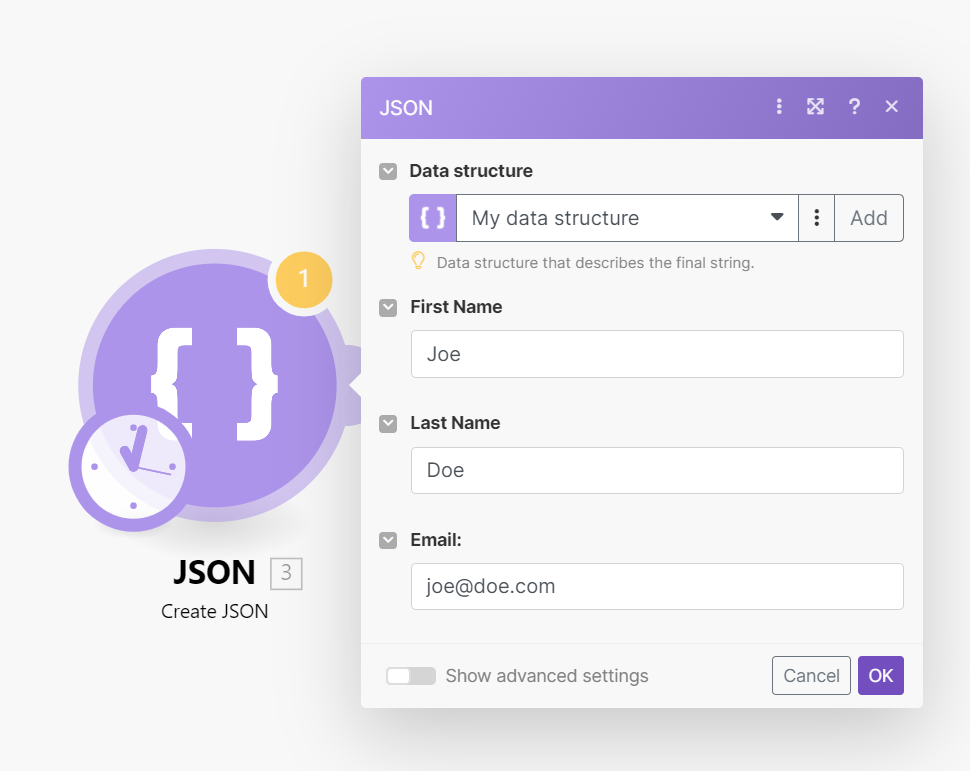
This module helps you create JSON. The fields in this module depends on your data structure.
The data structure describes how the JSON data is organized and enables mapping individual JSON items to other modules in your scenario.
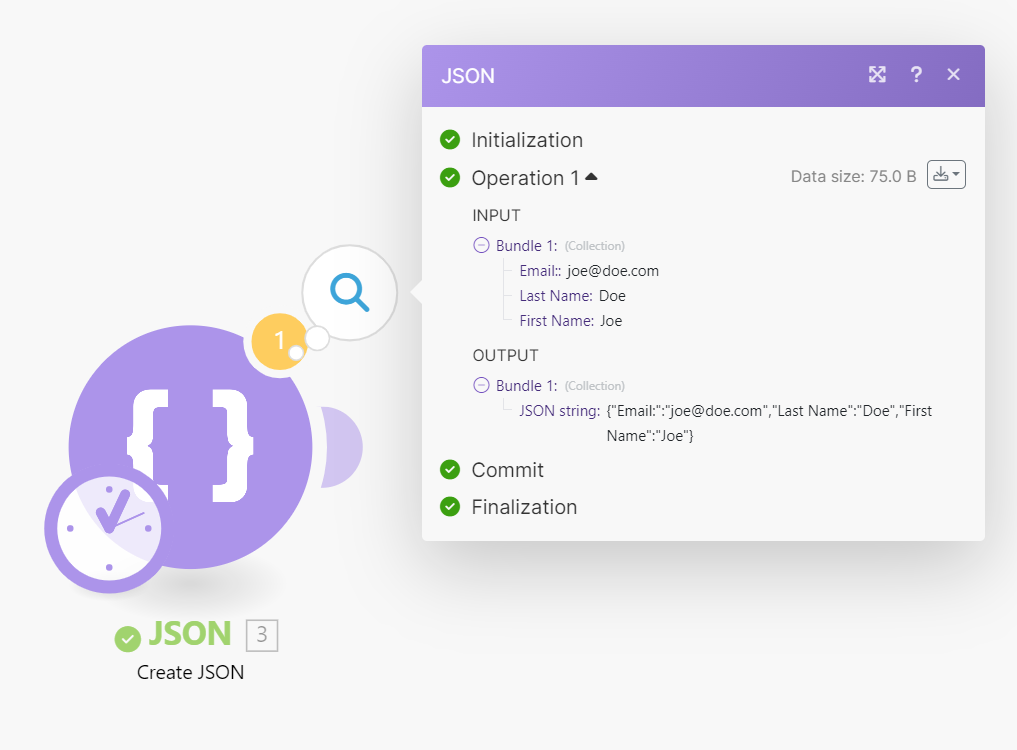
Select the data structure, and enter the field details to create JSON. The data provided in the module returns in the JSON format in the output.
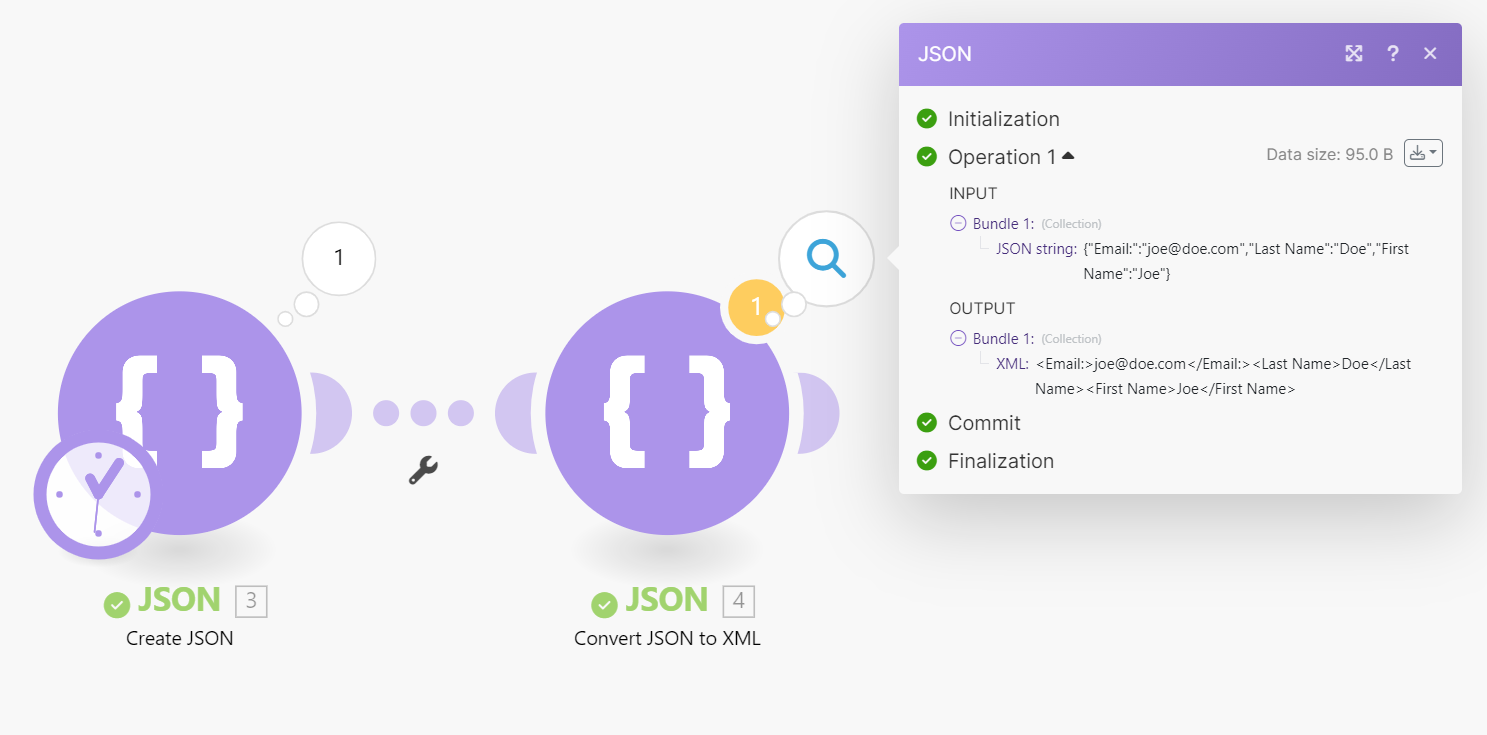
Converts the given JSON data to XML format.
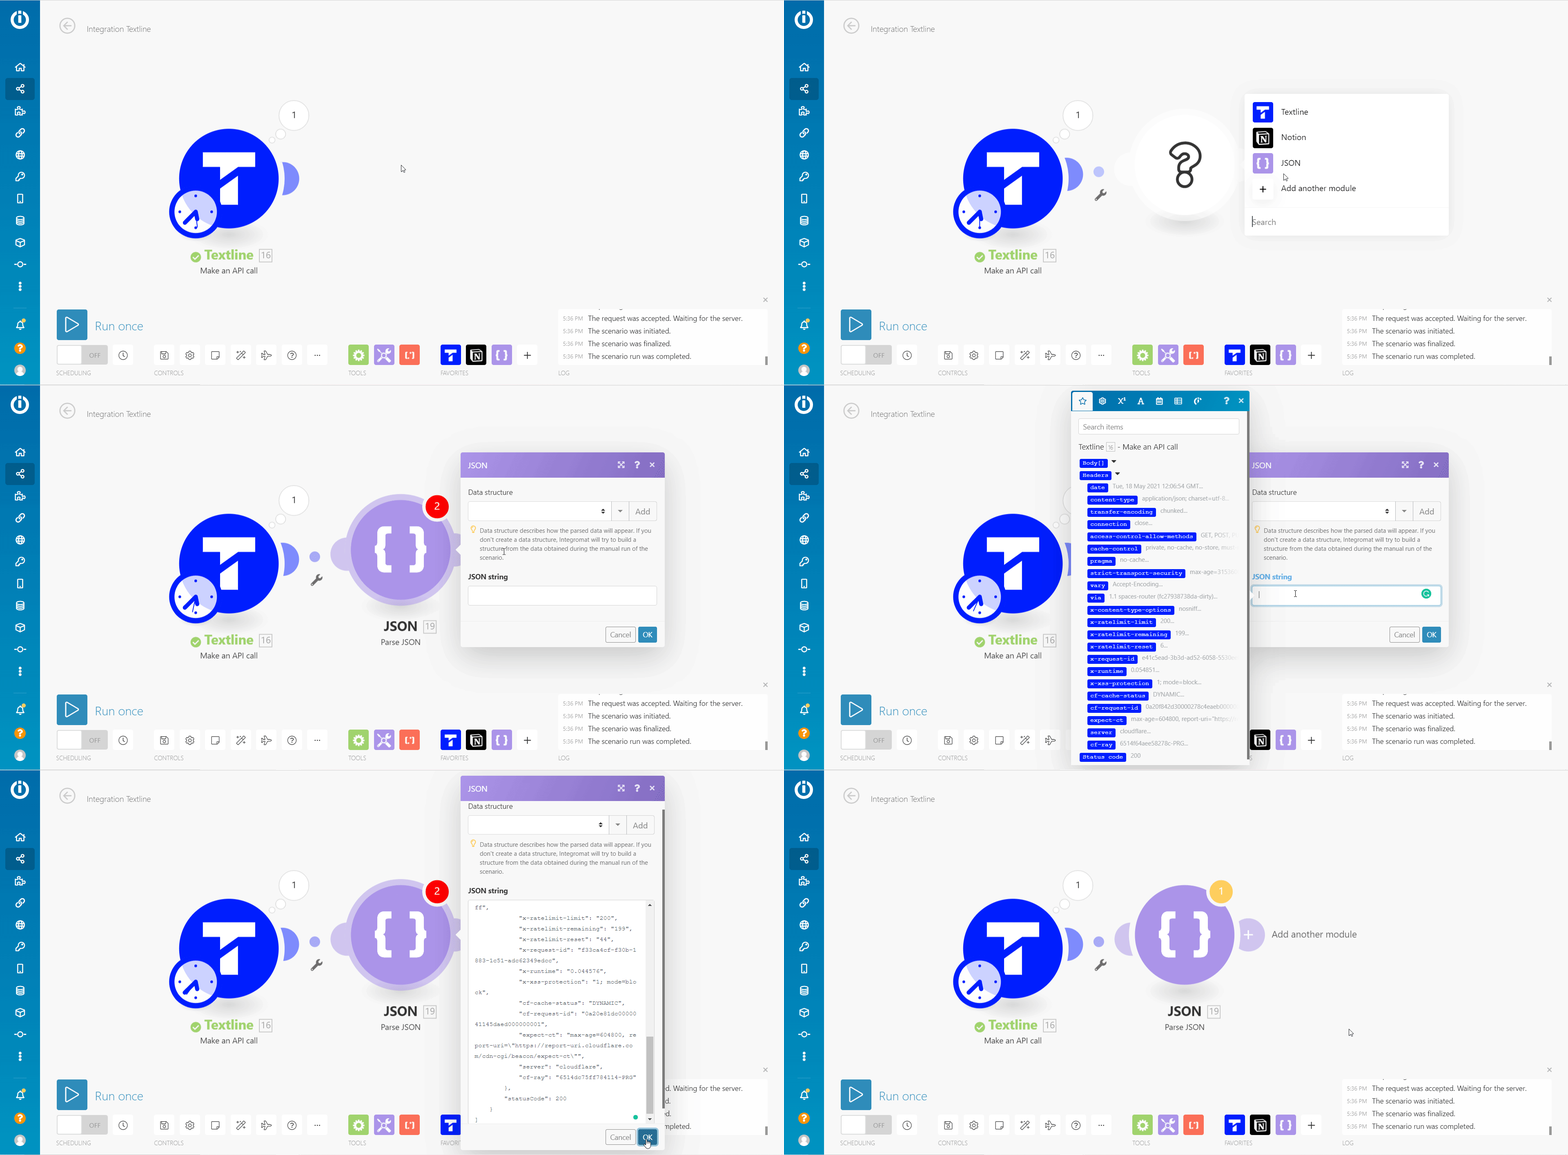
The data structure describes how the JSON data is organized and enables mapping individual JSON items to other modules in your scenario. If you don't provide the Data structure, you may manually execute the module and Make will build the structure from the provided JSON:
Fill the JSON String field in the Parse JSON module.
Do not yet connect the other following modules. Because Makedoes not know the structure of the JSON data, it will not be possible to map data from the Parse JSON module to other modules in your scenario.
Manually run the scenario. The Parse JSON module will identify the JSON structure from your provided JSON.
You can now connect the following modules. The items from the Parse JSON module will now be available for mapping.
JSON string field can contain a collection
{ ... }
{ "name" : "Peter", "ID" : 1}
In which case, the output will be a single bundle containing the items of the collection:
Or it can contain an array.
[ ... ]
:
[ { "name" : "Peter", "ID" : 1 }, { "name" : "Mike", "ID" : 2 }]
In which case the output will be a series of bundles, each bundle containing one array's item:
Let us assume that the data records you wish to transform to JSON format reside in a Google spreadsheet. Here is the procedure on how to transform the data records to JSON format described in ten steps:
Place the Google Sheets > Select rows module in your scenario to fetch the data. Set up the module to retrieve rows from your Google spreadsheet and set the Maximum number of returned rows to a small number but larger than one for testing purposes (e.g., three). Execute the Google Sheets module (right-click it and choose "Run this module only") and verify its output.
Connect the Array Aggregator module after the Google Sheets module. In the module's setup, choose the Google Sheets module in the Source node field. Leave the other fields as they are for the moment.
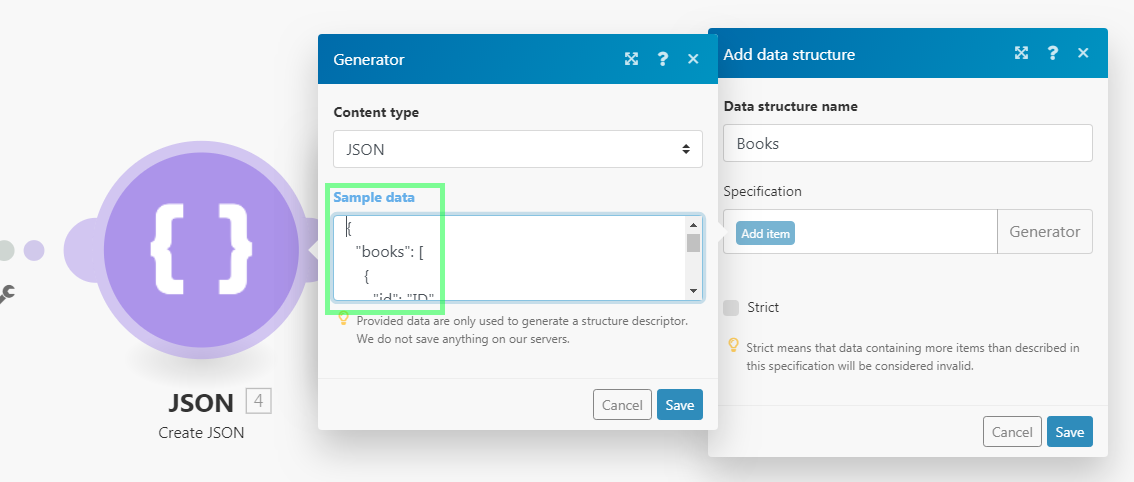
Connect JSON > Create JSON module after the Array Aggregator module. The module's setup requires a data structure that describes the JSON format. Click the Add button to open the Data structure setup. The easiest way to create this Data structure is to generate it automatically from a JSON sample. Click the Generator button and paste your JSON sample to the Sample data field:
{ "books": [ { "id": "ID", "title": "Title", "author": "Author" } ]}Click Save. The Specification field in the Data structure setup should now contain the generated structure.
Change the name of your Data structure to something more specific (e.g., "Books") and click Save. If everything goes well, a field corresponding to the root array attribute should appear mappable in the JSON module's setup.
Click the Map button next to the field and map the
Array[]item outputted from the Array aggregator module to it:
Click OK to close the JSON module's setup.
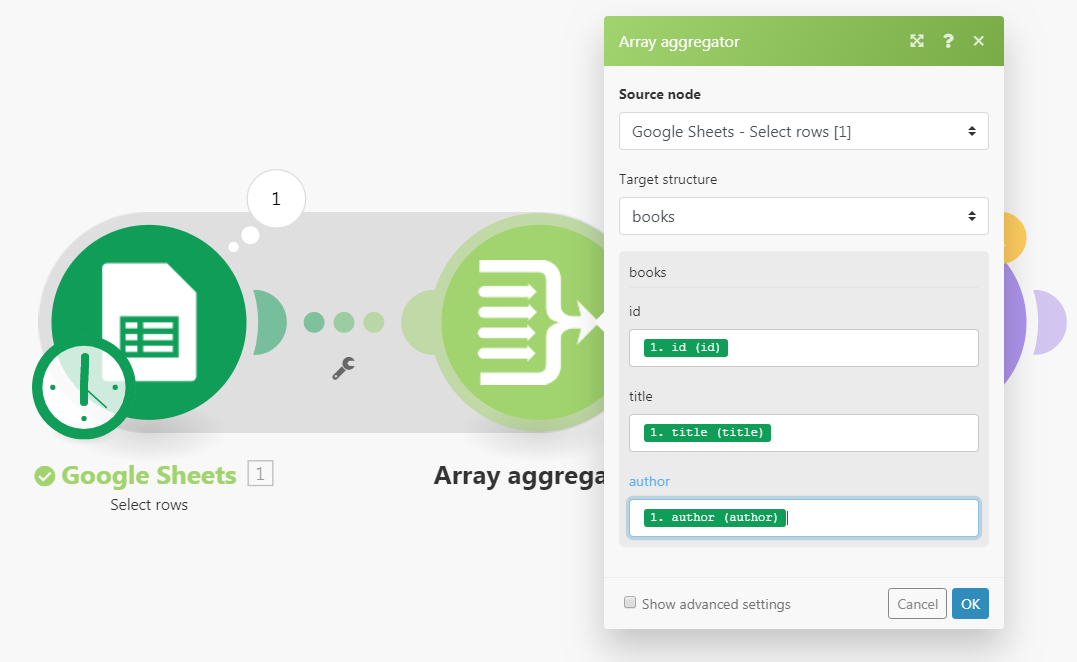
Open the setup of the Array Aggregator module. Change the Target structure from Custom to the JSON module's field corresponding to the root array attribute. Map items outputted from the Google Sheets module to the appropriate fields:
Click OK to close the Array Aggregator module's setup.
Run the scenario. If everything goes well, the JSON module should output the correct JSON format. Open the setup of the Google Sheets module and increase the Maximum number of returned rows number to be larger than the number of rows in your spreadsheet to process all the data. The resulting JSON can then be used as a body of an HTTP request, returned as a Webhook's response, etc.
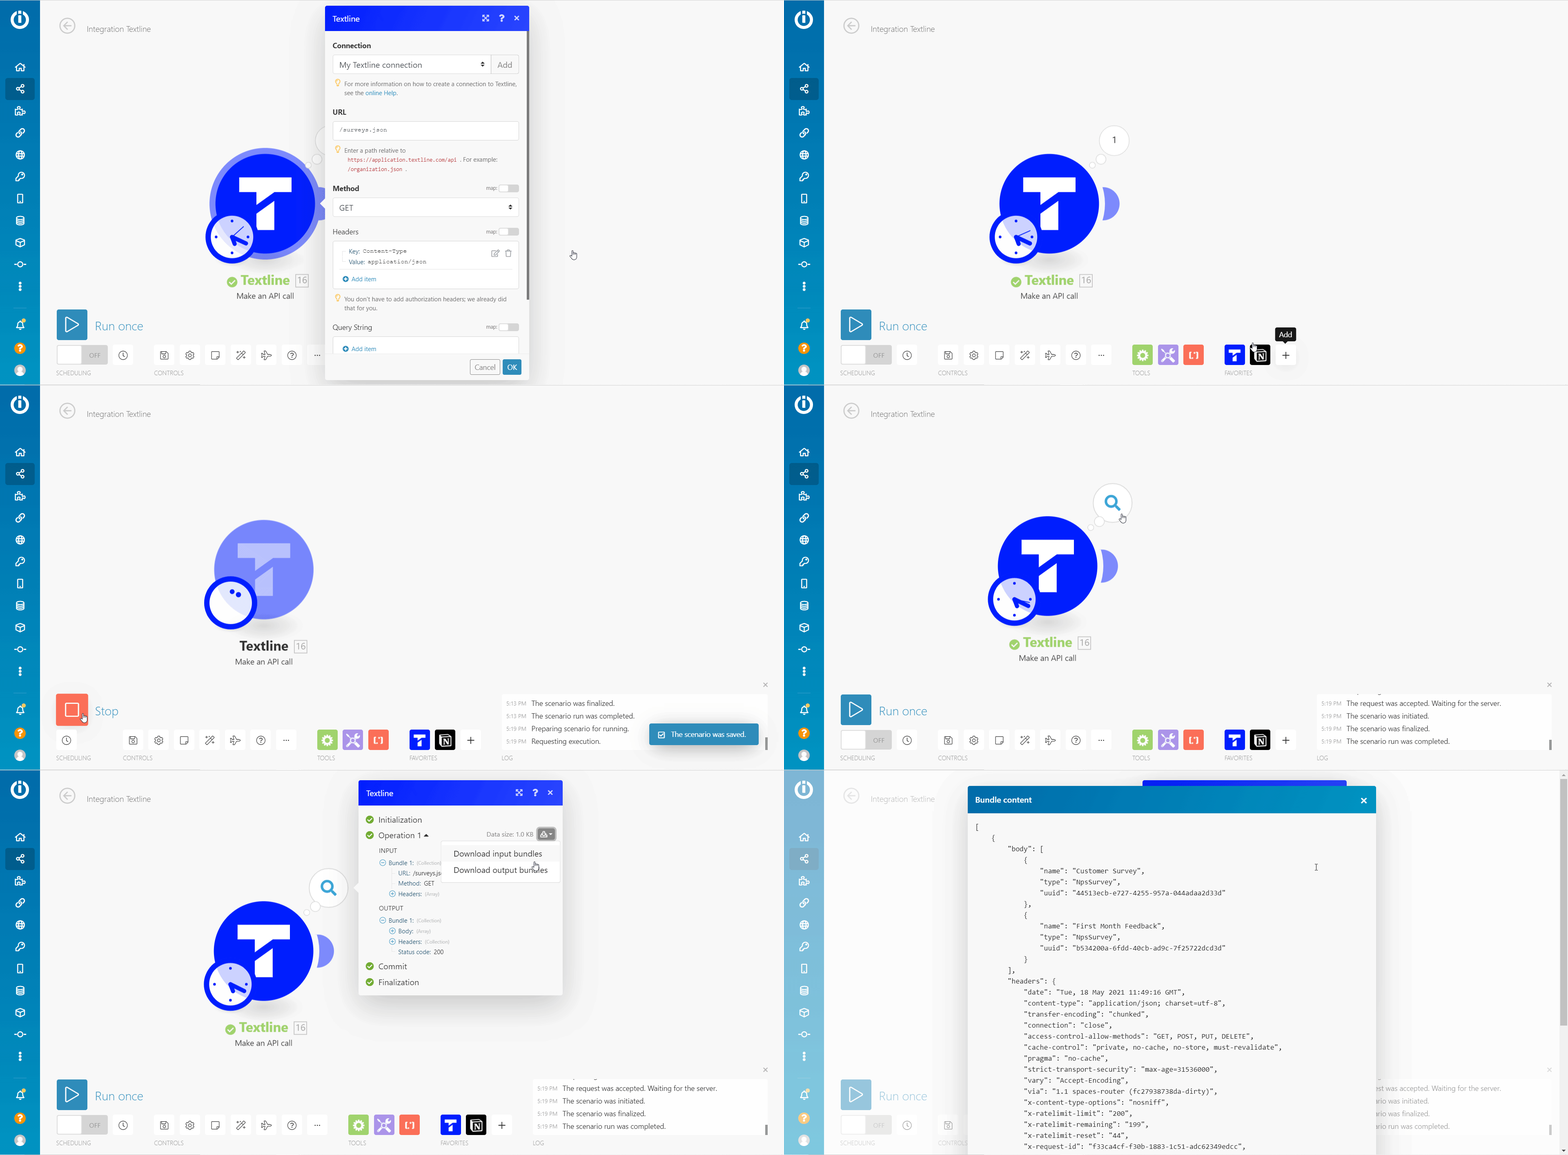
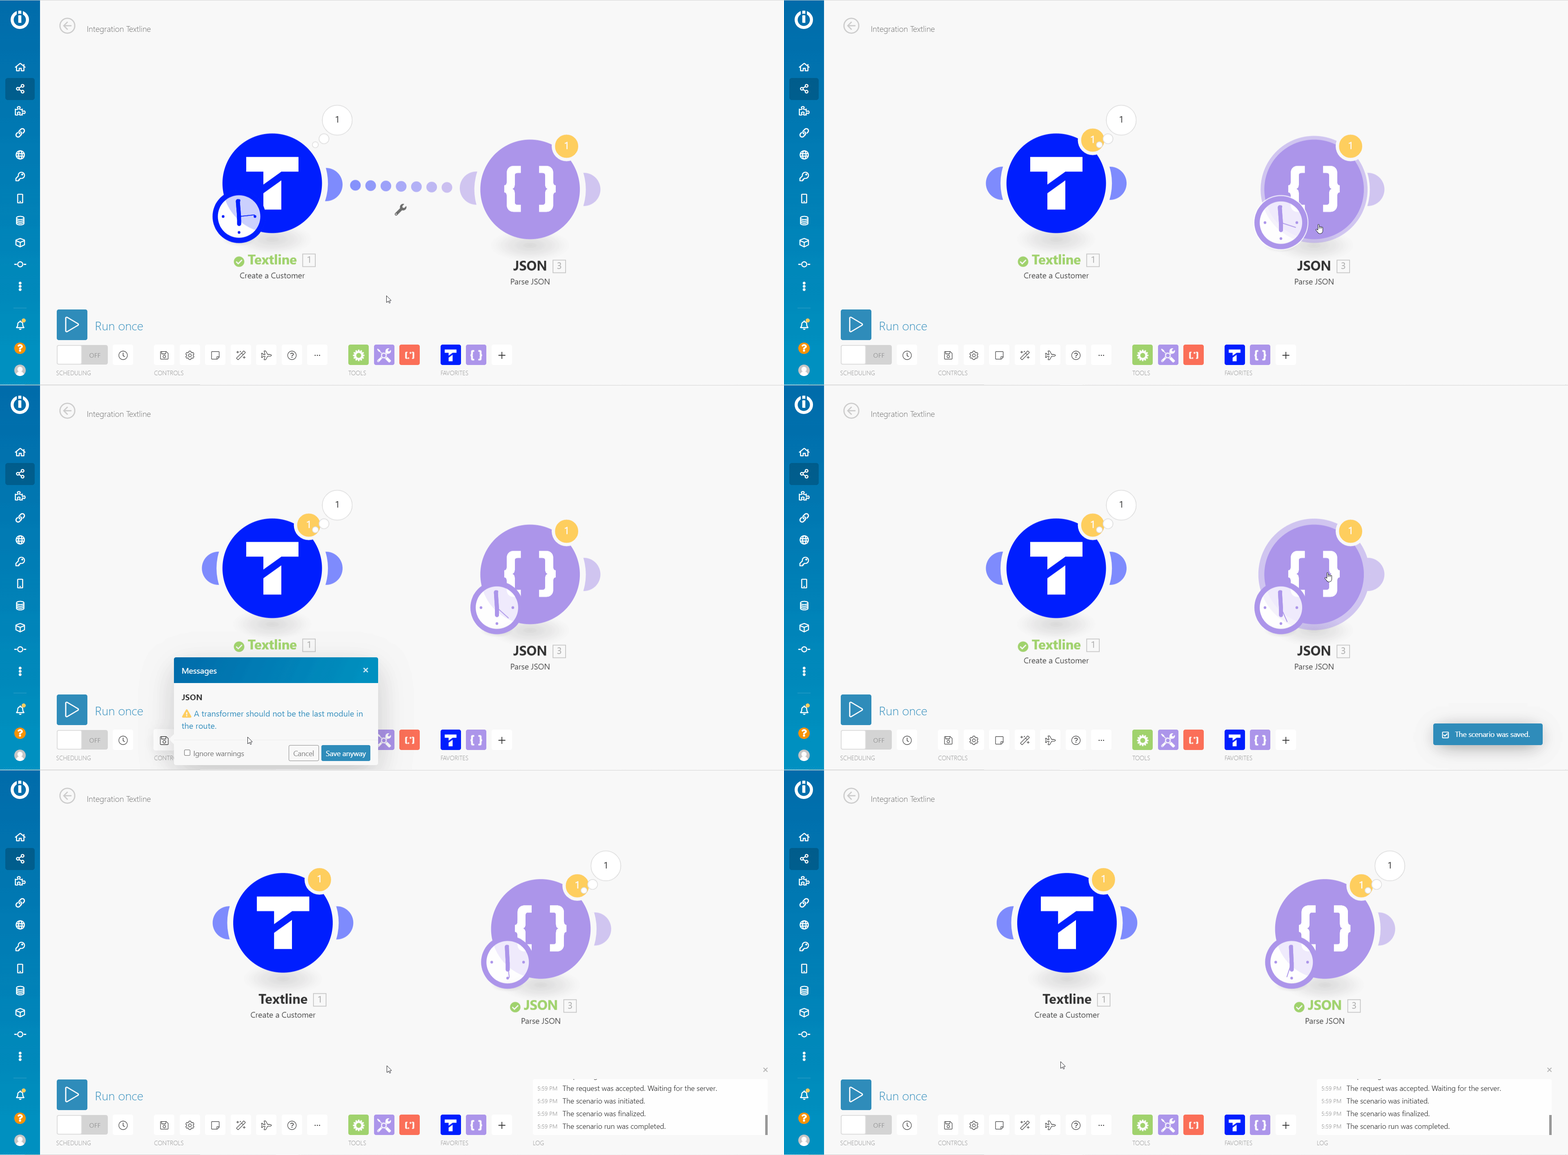
Make allows you to mock the data from the existing module and perform testing for your scenario. You can execute this operation using the Parse JSON tool from the Apps section.
Execute the module whose output data you want to mock using the Parse JSON.
Click the resulting output above the module.
Click Download output bundles from the dropdown menu.
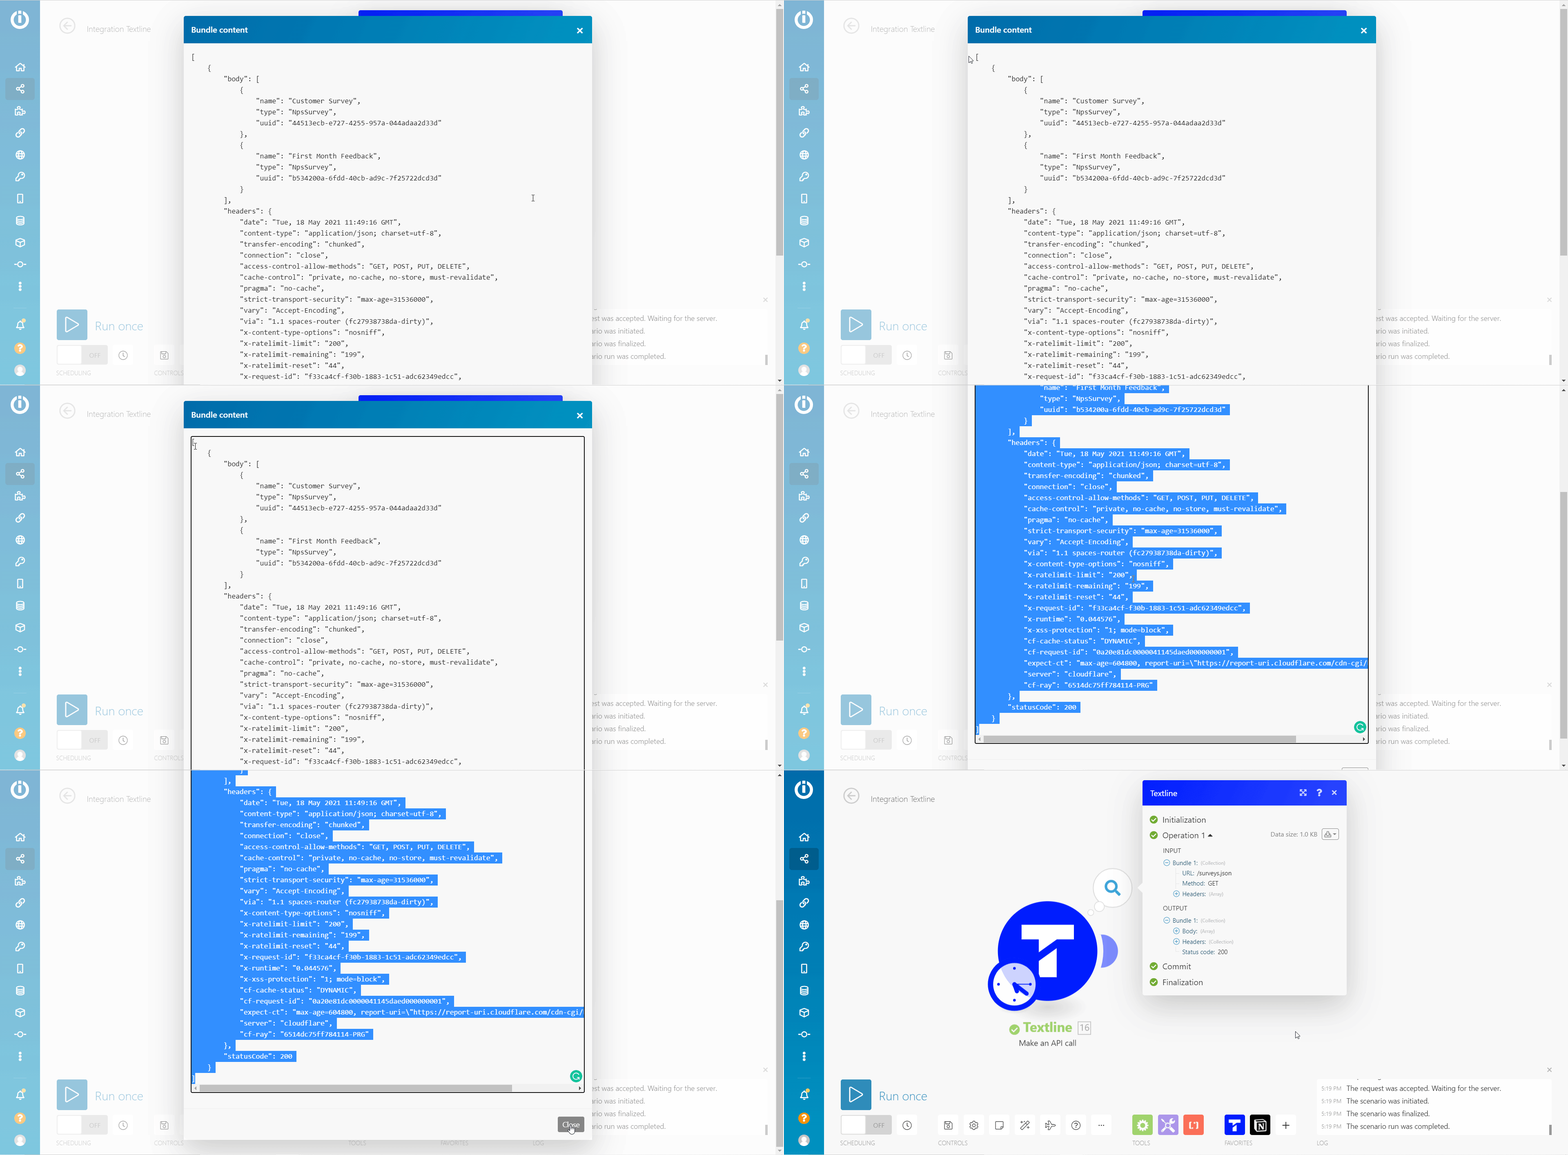
A window containing the original module's output bundles in JSON format pops up.
Copy the window's content and click Close.
Insert the Tools > Parse JSON module after the original module, open its configuration, and paste the copied JSON data in Step 4 into the JSON string field.
Unlink the original module from the scenario.
Do not delete the original module.
Execute the mock-up JSON module and use its output instead of the original module's output in your scenario.
Build and test your scenario.
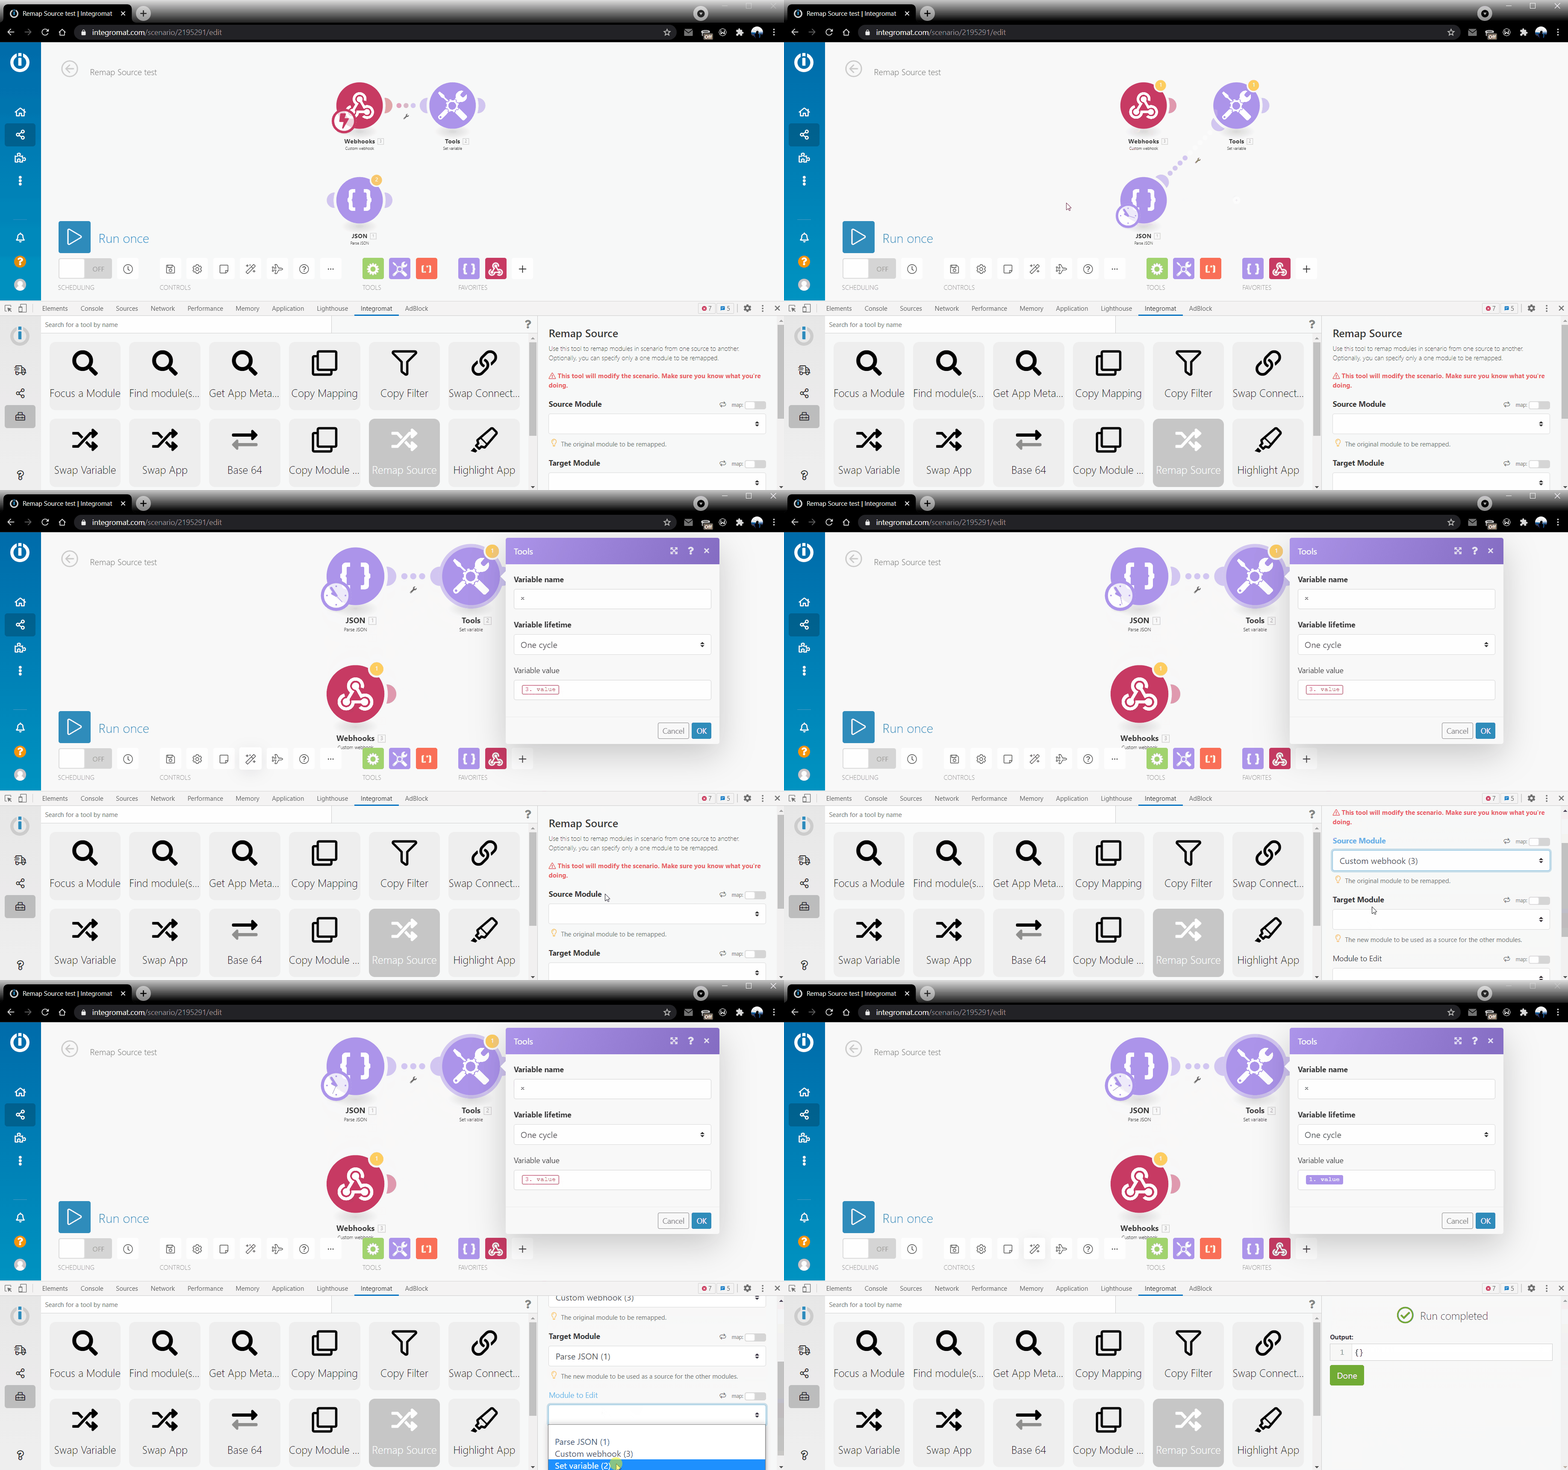
Once you are done with the testing, change the mapping from the mock-up module to the original module across the whole scenario with the DevTool's Remap Source tool.
Put back the original module before the mock-up JSON module and remove the JSON module.
In the Remap Source section, it is not necessary to fill the Module to Edit field unless you do not want to remap all values from the original module in the whole scenario.
Converts the multiple output bundles to a single bundle.
You need to attach this aggregator module to the source module whose output you want to convert to a single module; for example, the Parse JSON modules give the output in multiple bundles.
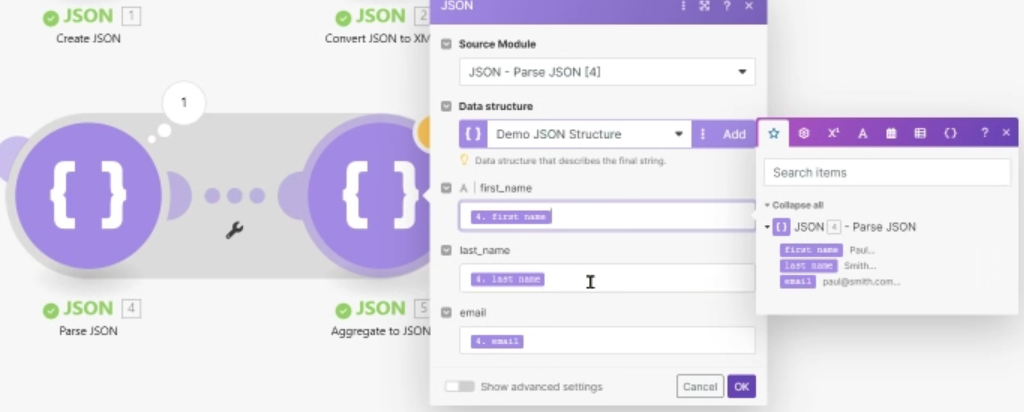
After selecting the source module, select the data structure, and the remaining fields are populated from the source module.
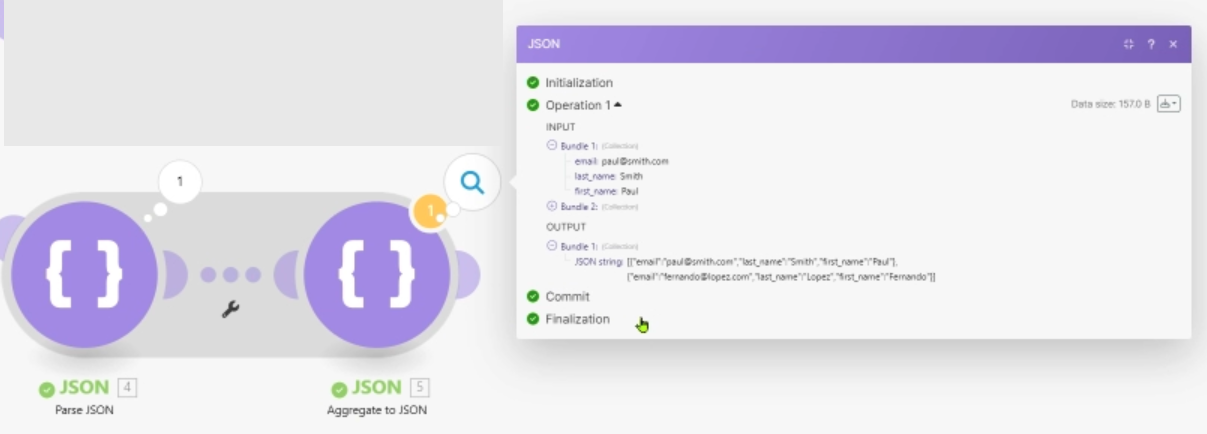
Save the scenario and execute it. You can see the output is only one bundle.
Cannot map data from the Parse JSON module
Ensure the JSON content is properly mapped into the Parse JSON module and the data structure is correctly defined. See the above section, JSON processing, for more details.
Was this article helpful?
That’s Great!
Thank you for your feedback
Sorry! We couldn't be helpful
Thank you for your feedback
Feedback sent
We appreciate your effort and will try to fix the article
