CommCare
Modified on Fri, 16 Aug, 2024 at 4:59 PM
The Commcare modules allow you to watch the forms, and cases in your Commcare account.
Prerequisites
A Commcare account
In order to use Commcare with Make, it is necessary to have a CommCare account. If you do not have one, you can create a Commcare account at dimagi.com/commcare.
Notice
The module dialog fields that are displayed in bold (in the Make scenario, not in this documentation article) are mandatory!
To connect your Commcare account to Make you need to obtain the API Key from your CommCare account and insert it in the Create a connection dialog in the Make module.
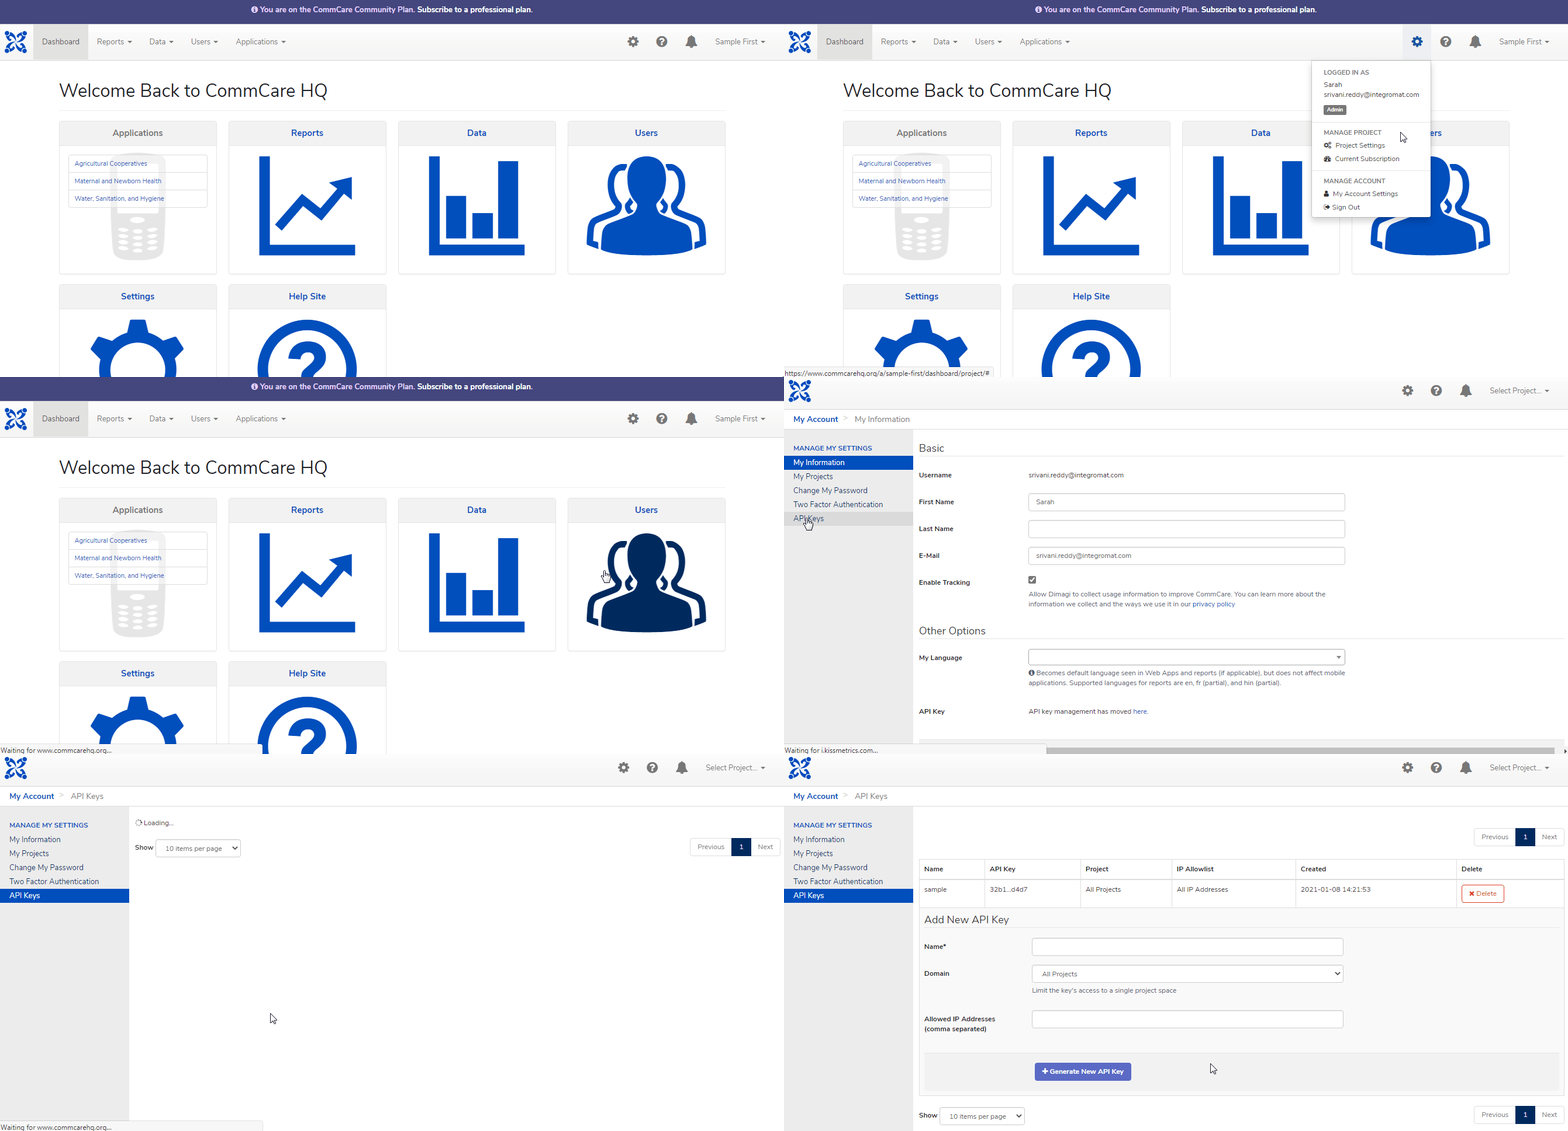
Log in to your CommCare account.
Click Settings (the cog-wheel) > My Account Settings > API Keys.
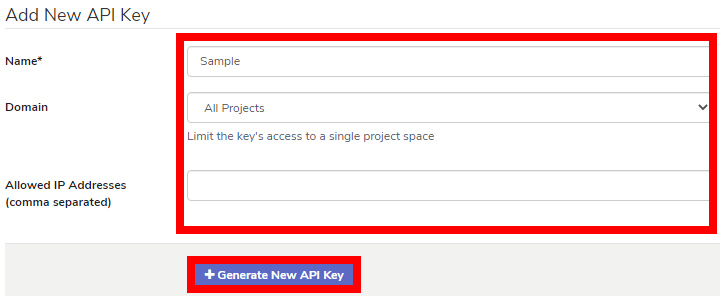
Enter a name for the API Key, select the permissions, and click Generate API Key.
Copy the API key to your clipboard.
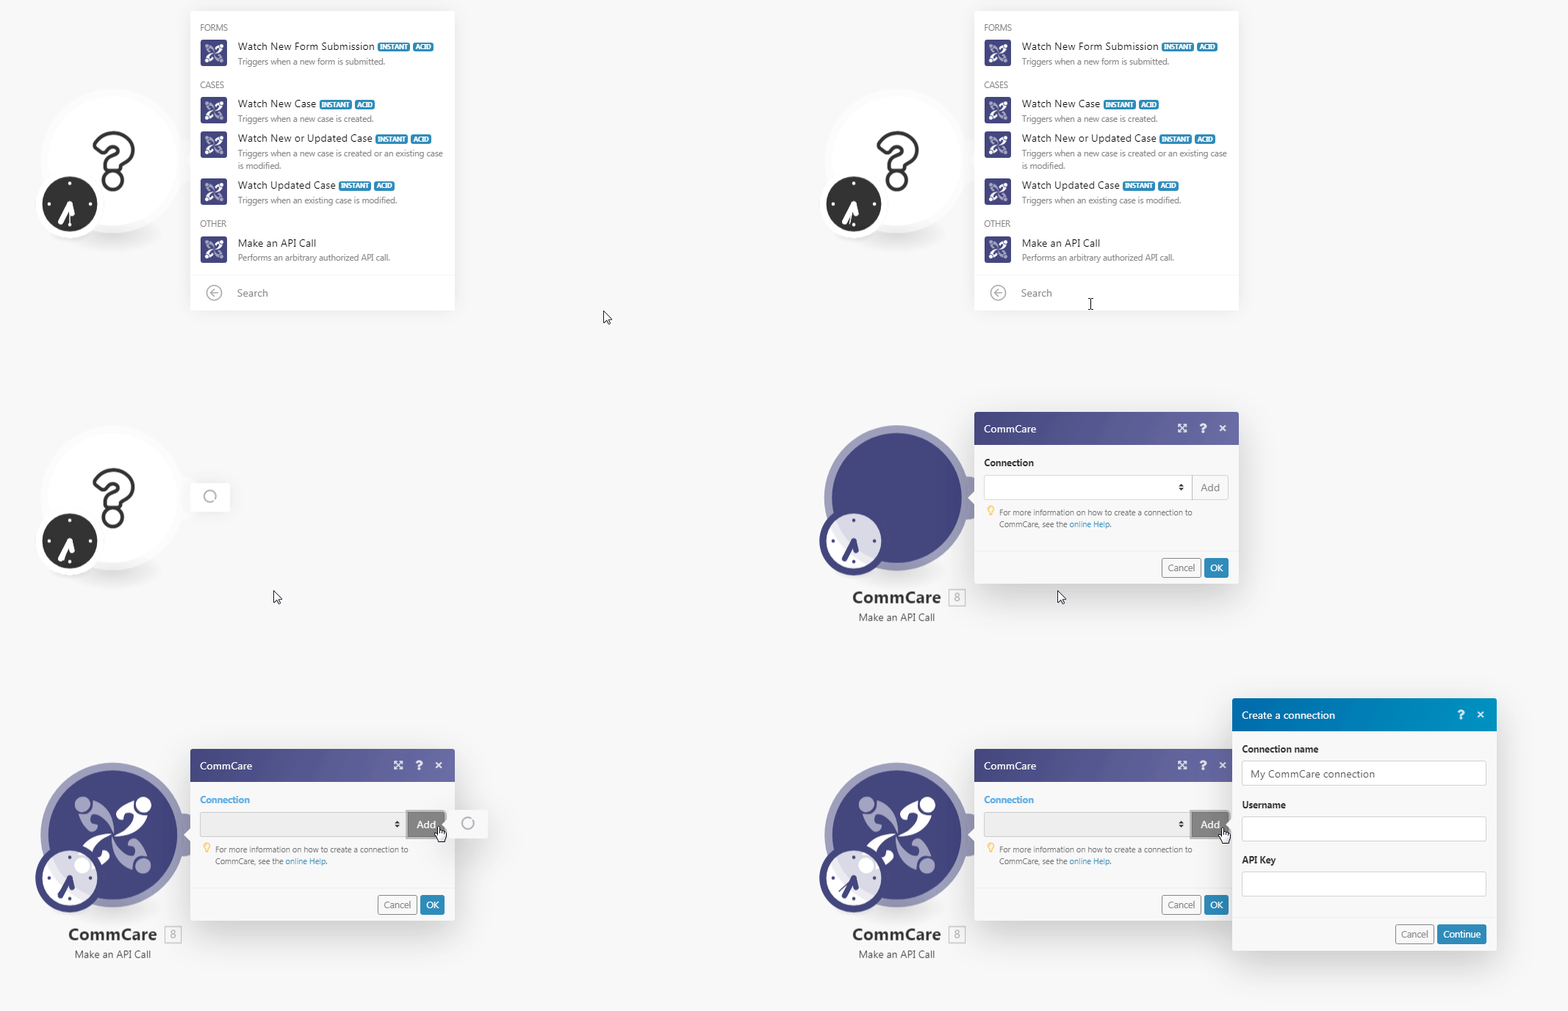
Go to Make and open the CommCare module's Create a connection dialog.
In the Connection name field, enter a name for the connection.
In the Username field, enter your account's username.
In the API Key field, enter the API details copied in step 4 and Continue.
The connection has been established.
To trigger the watch modules, see Setting Up the CommCare Webhooks.
To trigger the watch modules, see Setting Up the CommCare Webhooks.
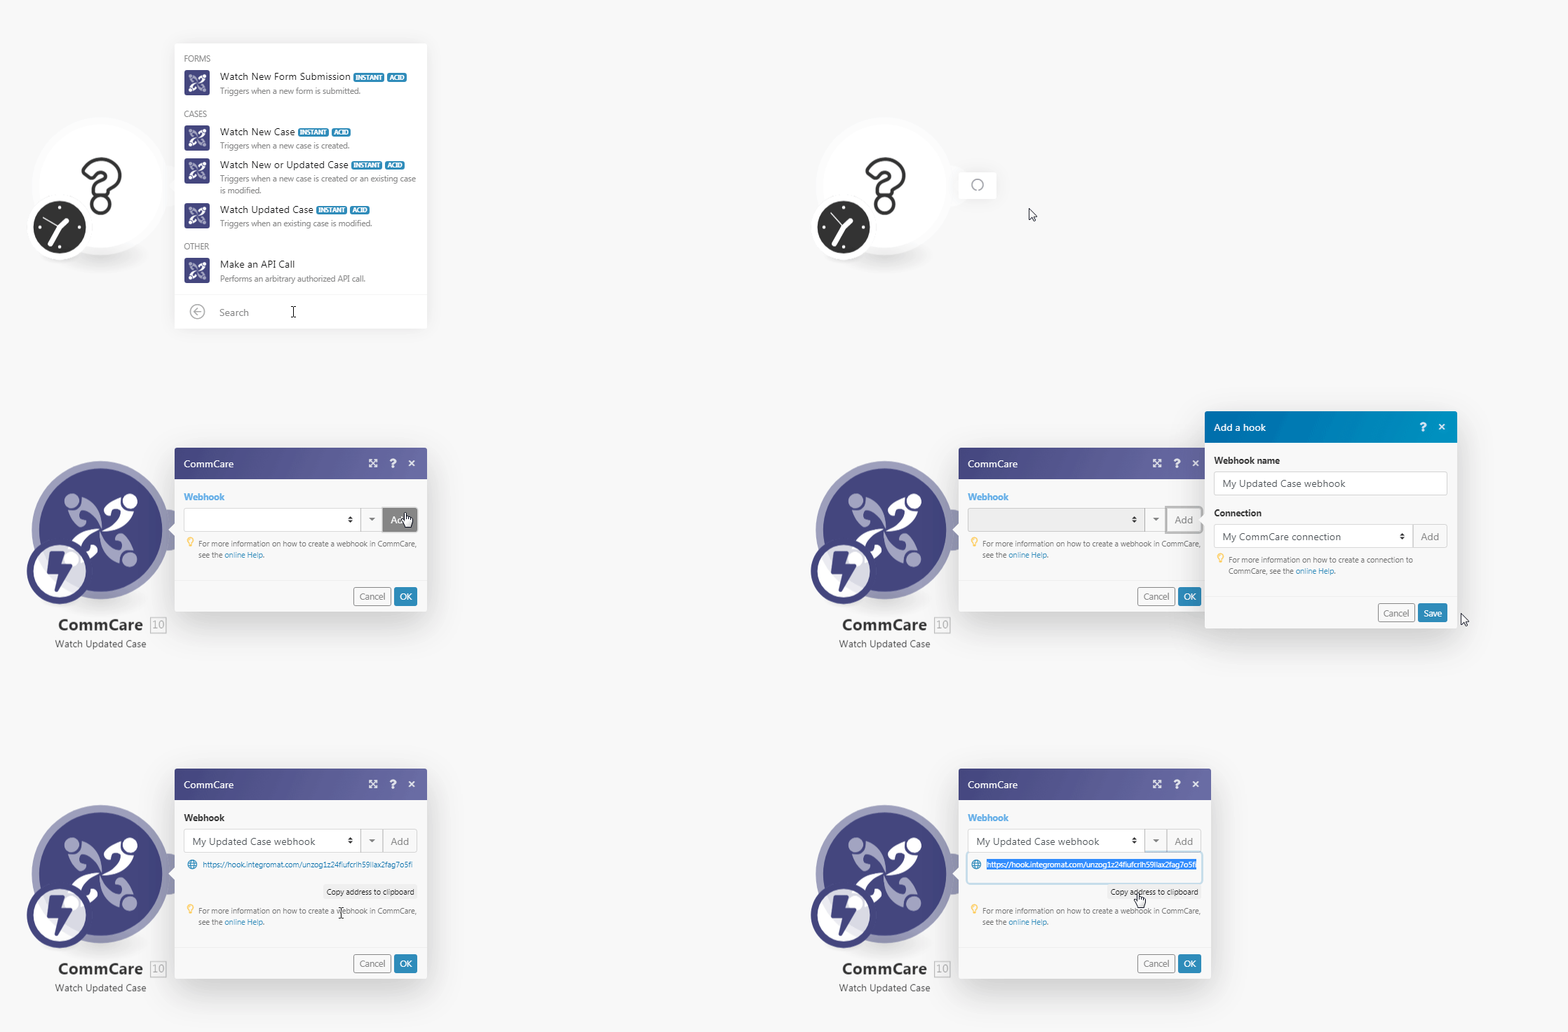
Open any Watch module, establish a connection, click Save, and copy the URL address to your clipboard. Click OK and save the trigger.
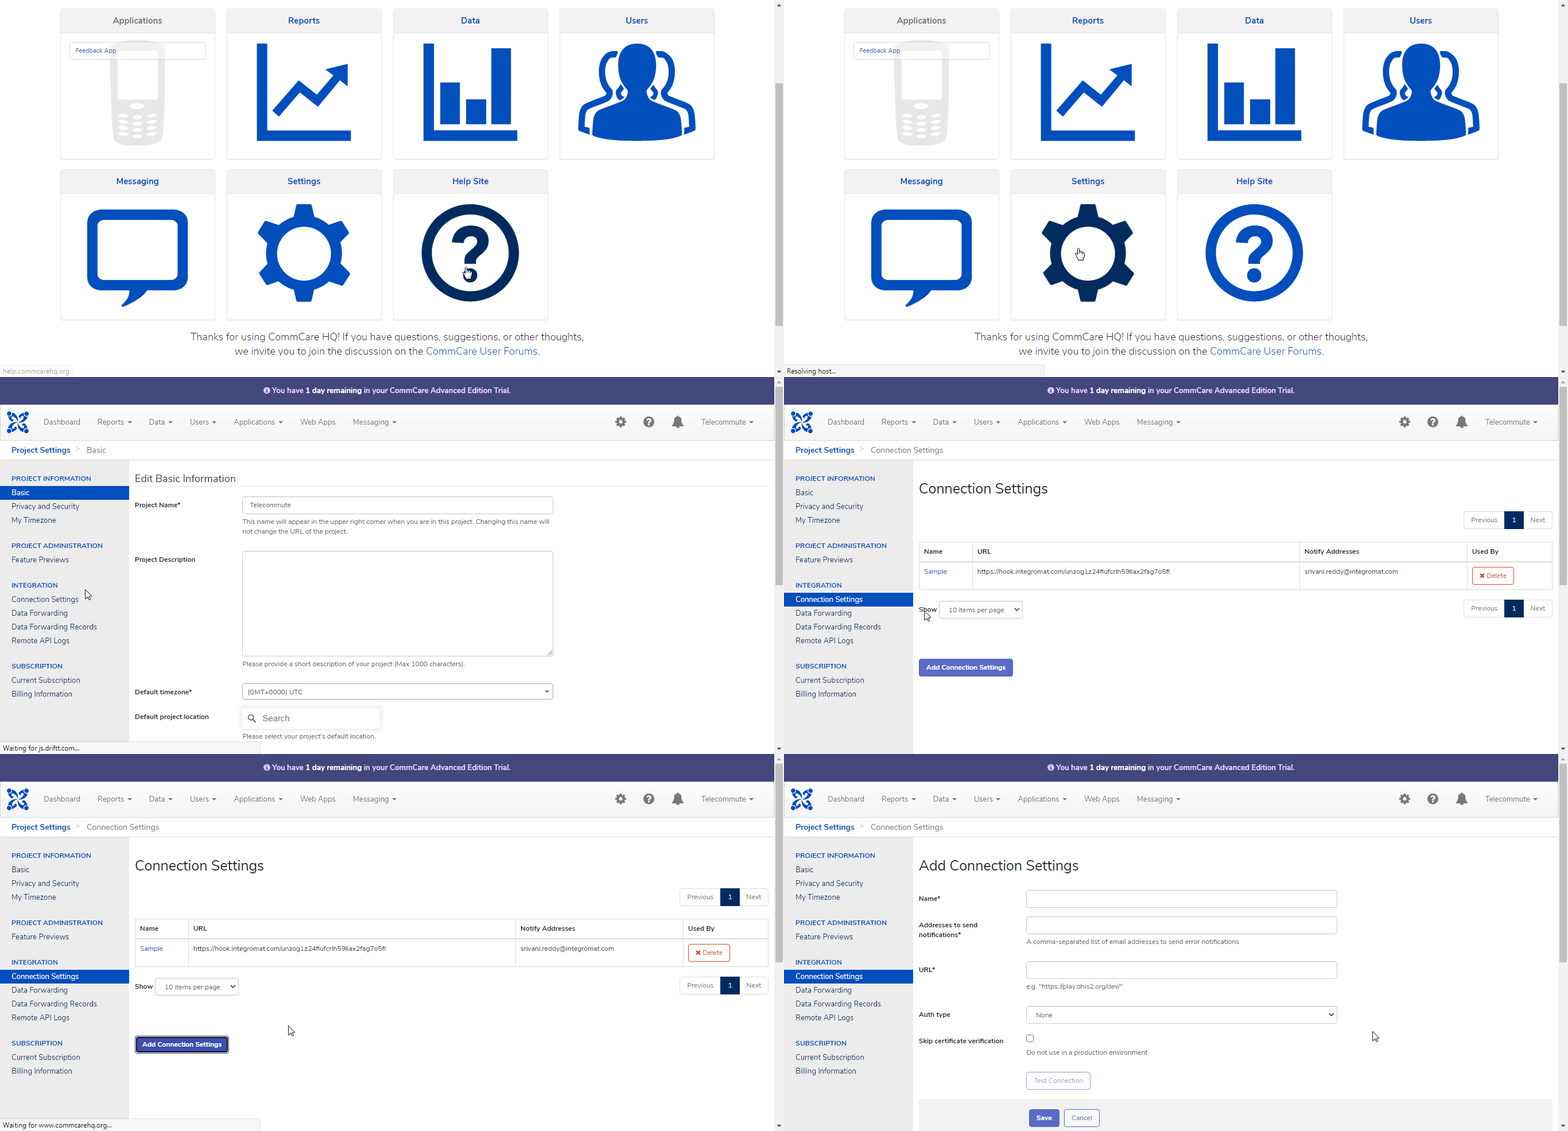
Log in to your CommCare account. From the Dashboard, click Settings > Connection Settings > Add Connection Settings.
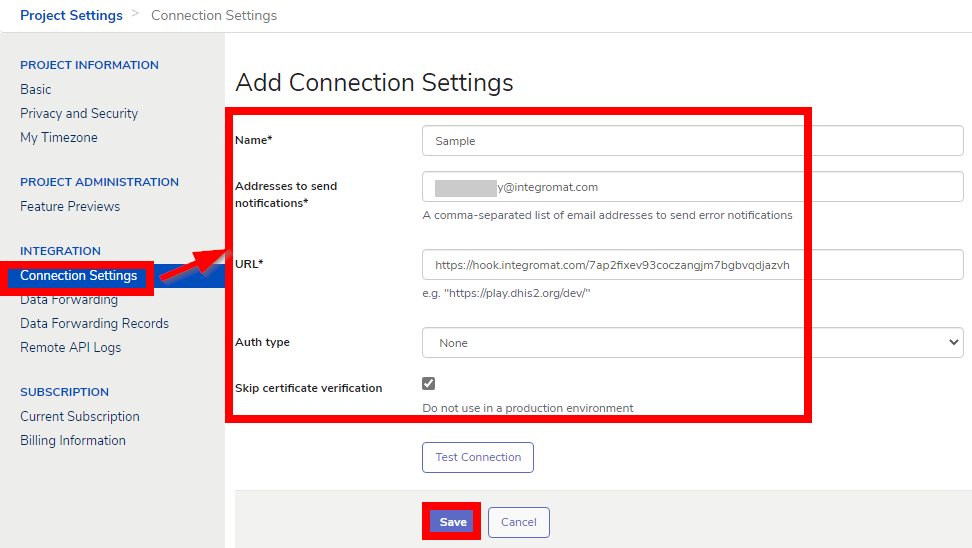
Enter the details for the connection and click Save.
Name
Enter a name for the webhook.
Address to send notifications
Enter the email address to which you want to send the trigger notifications.
URL
Enter the URL address copied in step 1.
Auth Type
Select the authentication type and enter the details:
None
HTTP Basic
HTTP Digest
Bearer Token
OAuth1
OAuth 2.0 Password Grant
Skip Certificate Verification
Select the checkbox to skip the certificate verification.
You have created the connection successfully.
Once you have created the webhook connection, setup the required data forwarding as mentioned here.
Was this article helpful?
That’s Great!
Thank you for your feedback
Sorry! We couldn't be helpful
Thank you for your feedback
Feedback sent
We appreciate your effort and will try to fix the article
